A first aid kit is one of the core essentials to take on any outdoor adventure or hiking trip. There are lots of pre-made hiking first aid kits out there, which you can just buy and stuff into your bag. However, these are not tailored to your individual health situation nor to the specific adventure you’re embarking on. Also, many times the products included are of lower quality and that’s the last thing you want in an emergency situation. So, I’d always recommend putting together your own, individual first aid kit for hiking or any outdoor adventures.
But how to create your individual outdoor first aid kit? I know there’s A LOT of information and content out there and it can be quite overwhelming. But don’t worry, I’ve got you.
Here are three simple questions, you should ask yourself before putting together your individual first aid kit:
- What’s your personal health situation? What predispositions do you have?
- What kind of adventure are you planning to go on? What kind of “uncomfortable” situations are most likely to happen (e.g. blisters, burns, insect bites)?
- What kind of life-threatening situations could happen (e.g. falling down a cliff, snake bites, getting lost in freezing temperatures)?
Once you answer these questions, you’ll have a much clearer idea of what you’re dealing with and you will be able to tailor your first aid kit accordingly.
This is exactly the process I went through to put together my individual first aid kit for hiking the Alpe Adria Trail. I spend a lot of time researching on the most important content for an outdoor first aid kit for long distance hiking trails. How to reduce weight without compromising functionality. How to cater to likely, yet “only” uncomfortable situations vs. unlikely, yet potentially life-threatening situations. My hiking first aid kit turned out incredibly useful and I was even able to help out a few fellow hikers along the road. But I also learnt a lot on what to include or leave out in an outdoor first aid kit for a long distance hike, which I’m super happy to share with you in this article!
So, how do you create a hiking first aid kit for outdoor adventures?
Well, in short: Tailor it to your individual needs.
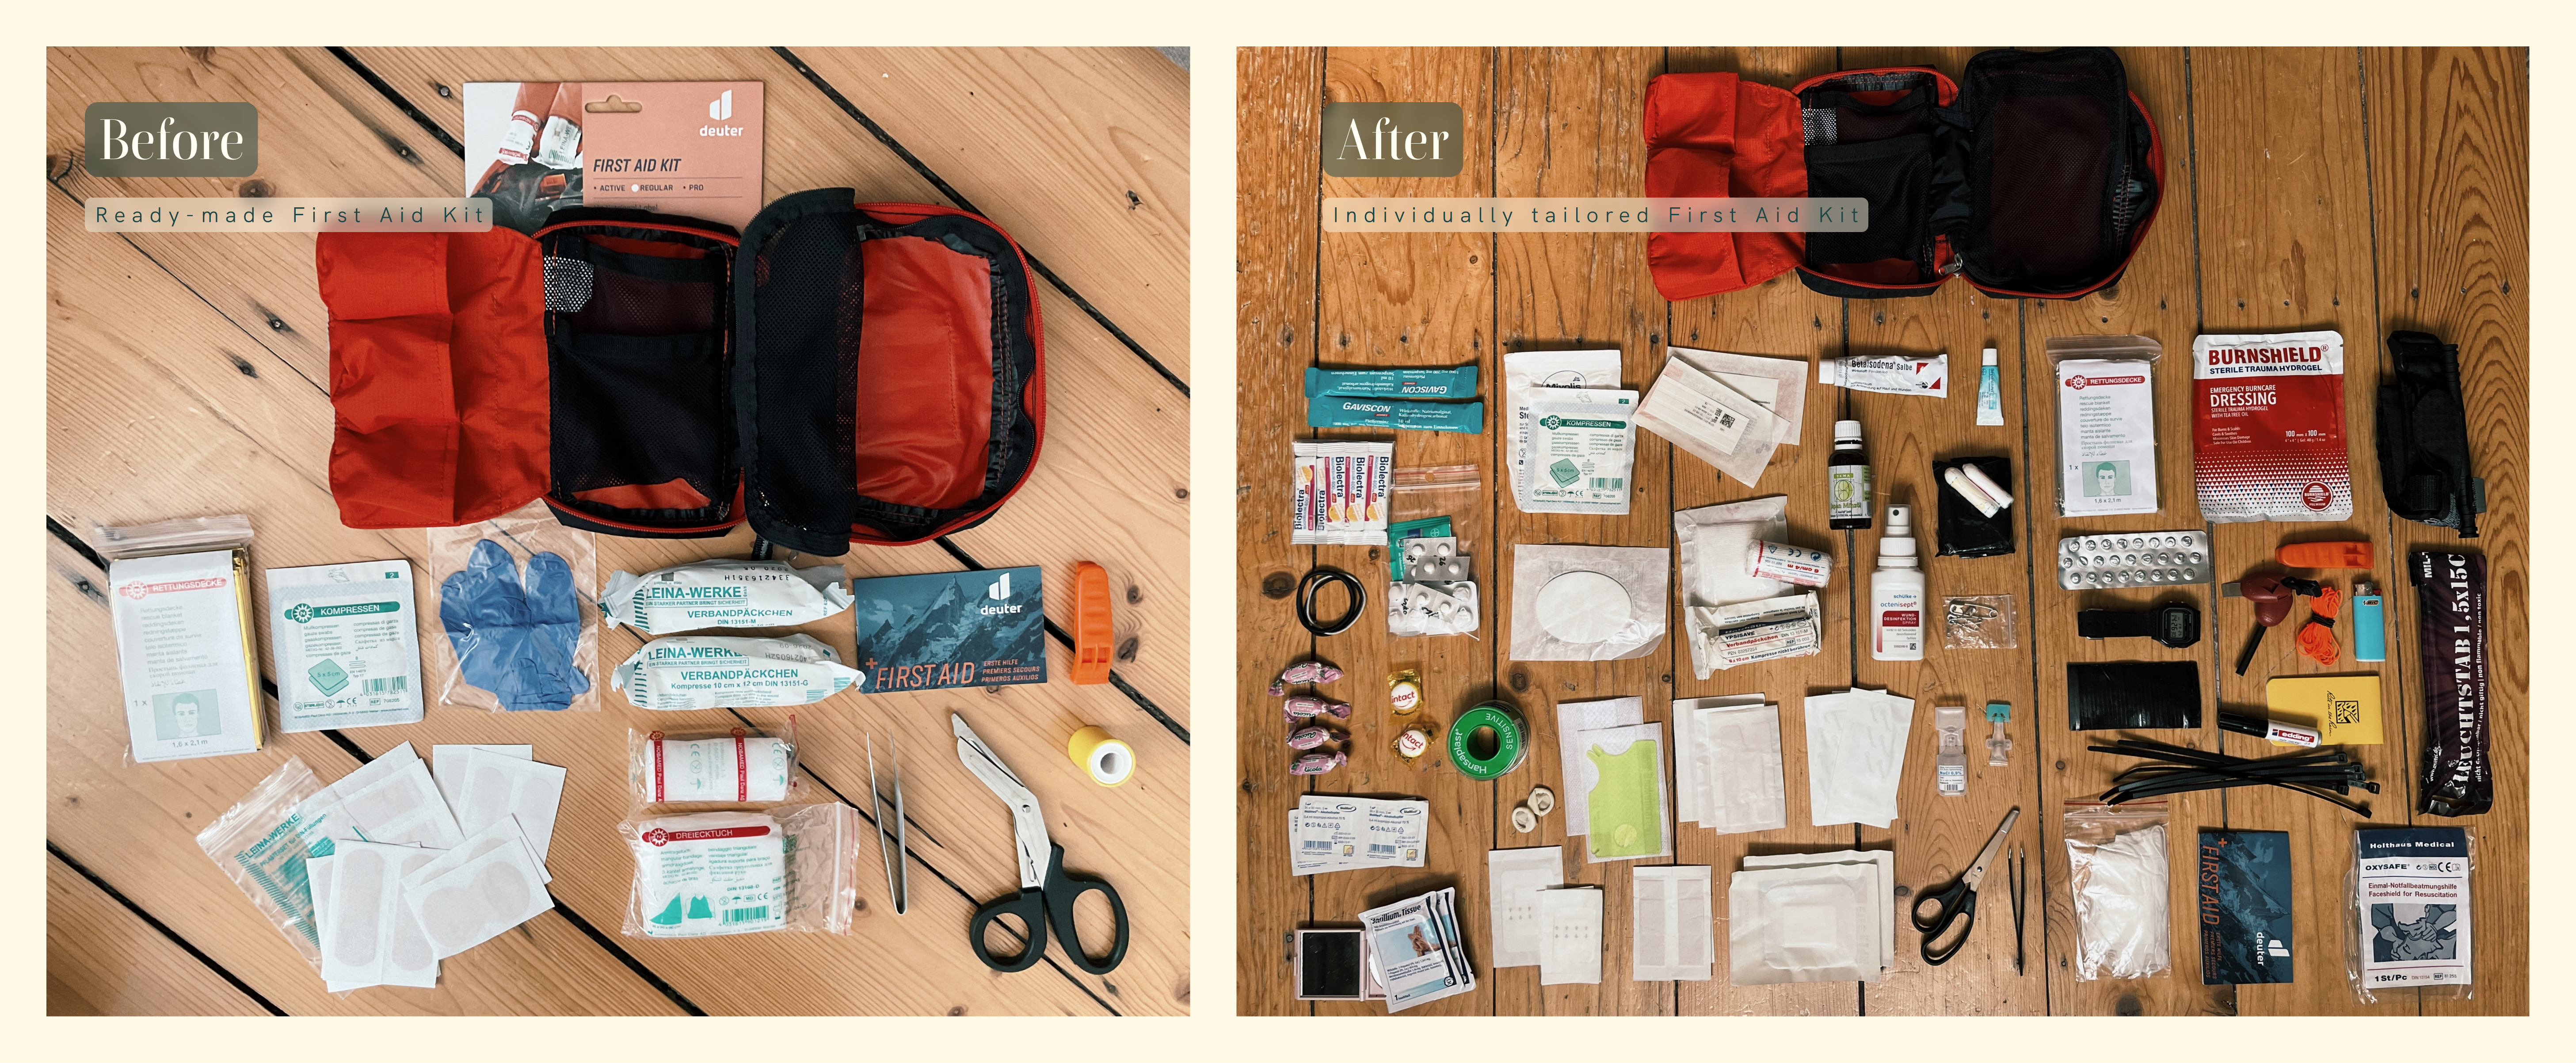
You’ve already got the contents of your first aid kit together? Amazing! Jump right down to my first aid kit pouch recommendations.
What to Include in Your Outdoor First Aid Kit for Hiking?
I’ll share with you the contents of my first aid kit, which I take on any day or long distance hike. I’m including some explanations and learnings from my past hikes and experiences. Just a disclaimer upfront: This is no medical advice and I’m not a medical professional. I’ve put this together based on what I learnt in courses, online research and through my personal hiking and outdoor experience. Also, might be worth noting that I’m based in Europe so some of the content might not be as common or available elsewhere in the world.
A first aid kit with the contents I’m proposing below is definitely on the slightly more extensive and, thus, heavier side of the specturm. For me, a first aid kit is not the area where I want to over-optimize and go super-ultra-light on. Obvisouly, that’s a personal preference, but so far it’s been a very good approach for me.
Alright, here we go.
1. Part: Your individual health situation
Obviously, this part is highly individual and basically just a place holder for you to keep in mind to pack any medication or medical equipment you (might) need (regularly). This could include for example: Allergy medication, asthma inhaler, contact lenses, birth control, medication for heart conditions, etc.
2. Part: Relieving likely, yet minor health issues
This is all the stuff that makes your life easier on a hike by relieving pain in one form or the other. None of these are meant to literally save your life but figuratively, they definitely will save your life or at least your hike. It’s also the content you’re likely to need more often. All of this is also super handy if you hike with others. Someone will always get blisters on their feet, hurting knees, headaches, a cut from som nasty shrubs, you name it. If you can pull out the right antidote you won’t only be that person’s hero, but also everyone elses as they won’t have to listen to complaints all hike long - or even worse, end the hike because of a sore toe.
So, what you’ll need to include is:
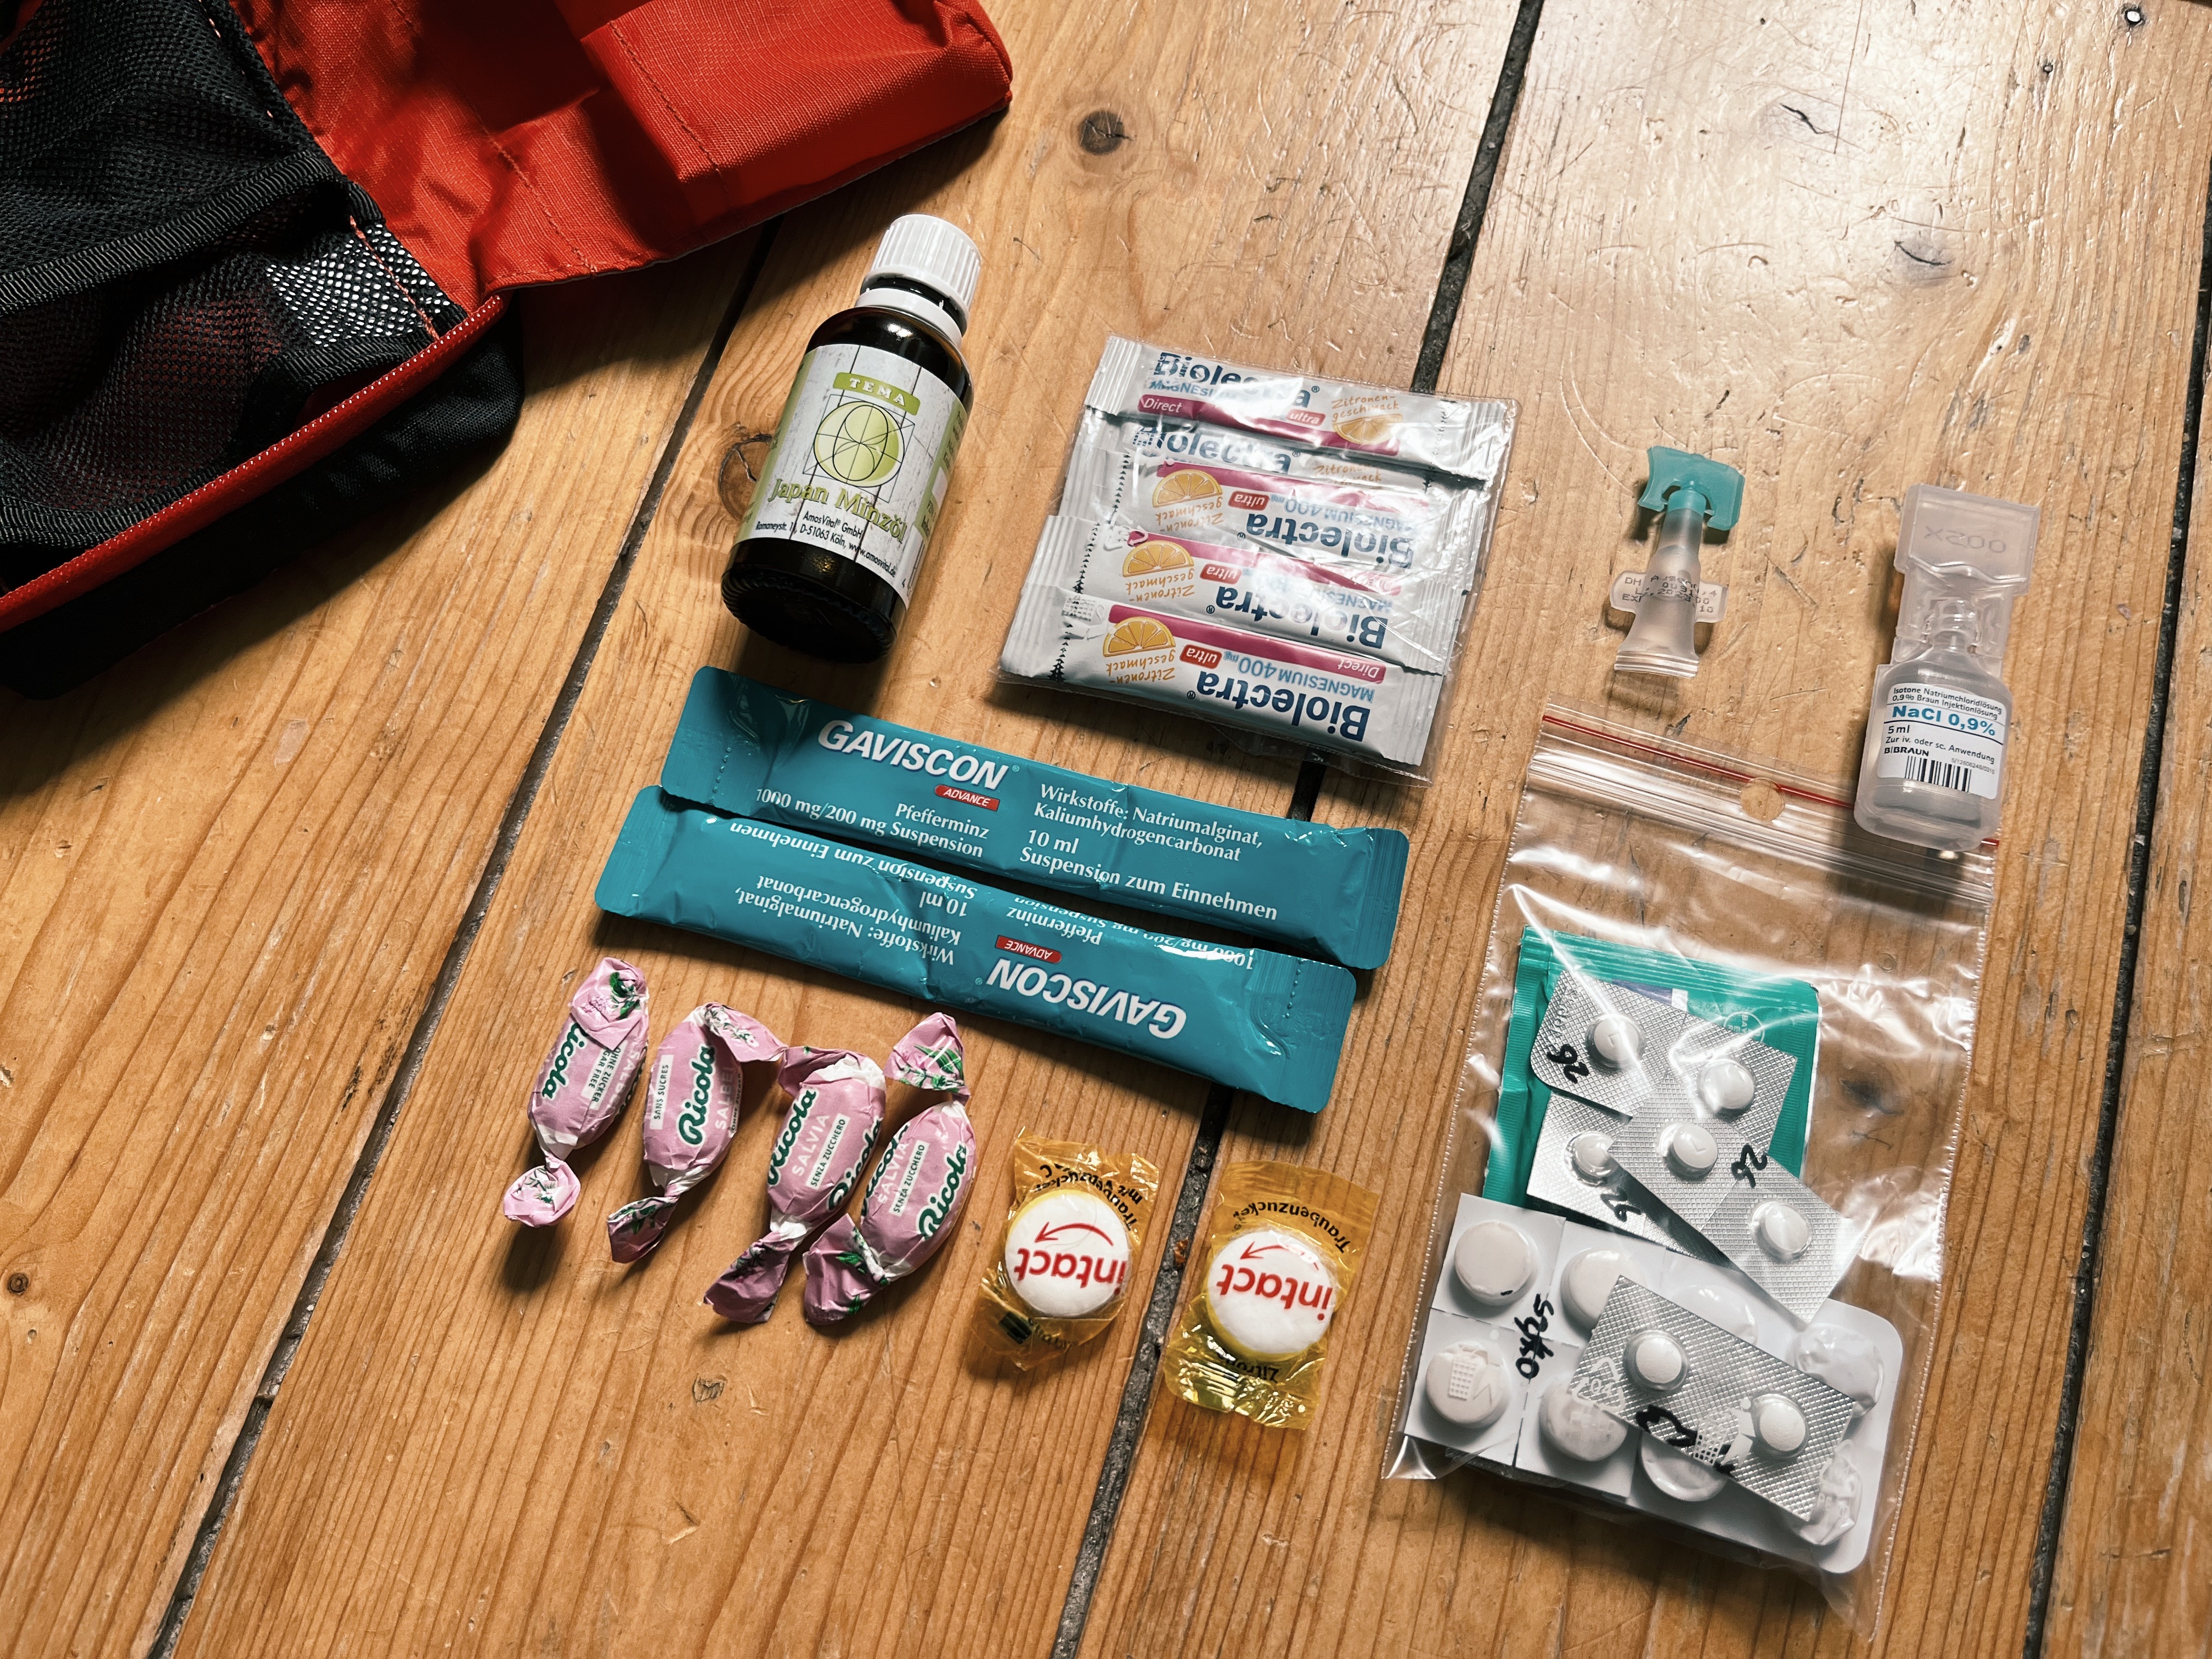
Basic meds to treat…
- Pain (I’d always take 2-3 different kinds of pain killers like ibuprofen, paracetamol, and naproxen)
- Allergies (even if you don’t suffer from allergies, you could either unexpectedly get an allergy or someone around you could need your help)
- Stomach cramps and diarrhea
- Heartburn
- Muscle cramps (little sachets of magnesium powder are quite commonly used)
- Sore muscles (I use mint oil for this)
- Insect bites (I also use mint oil for this)
- Low blood pressure (I also use mint oil for this, just kidding, some dextrose sugar will do)
- Dirt or dust in your eyes (I recommend having some saline solution as well as soothing eye drops on you)
- A sore throat
Here’s what this could look like:
Wound dressings
- A variety of bandages
- Blister patches (although I almost exclusively use Hiker’s wool instead now)
- 2-3 wound dressings
- Sterile gauze dressing pads (I also like to carry one oval one for insuries on the eyes)
- Fixation plaster
- Stitch plaster
- Antiseptic or iodin ointment
- Wound disinfection spray and/or wipes
This is my set-up:

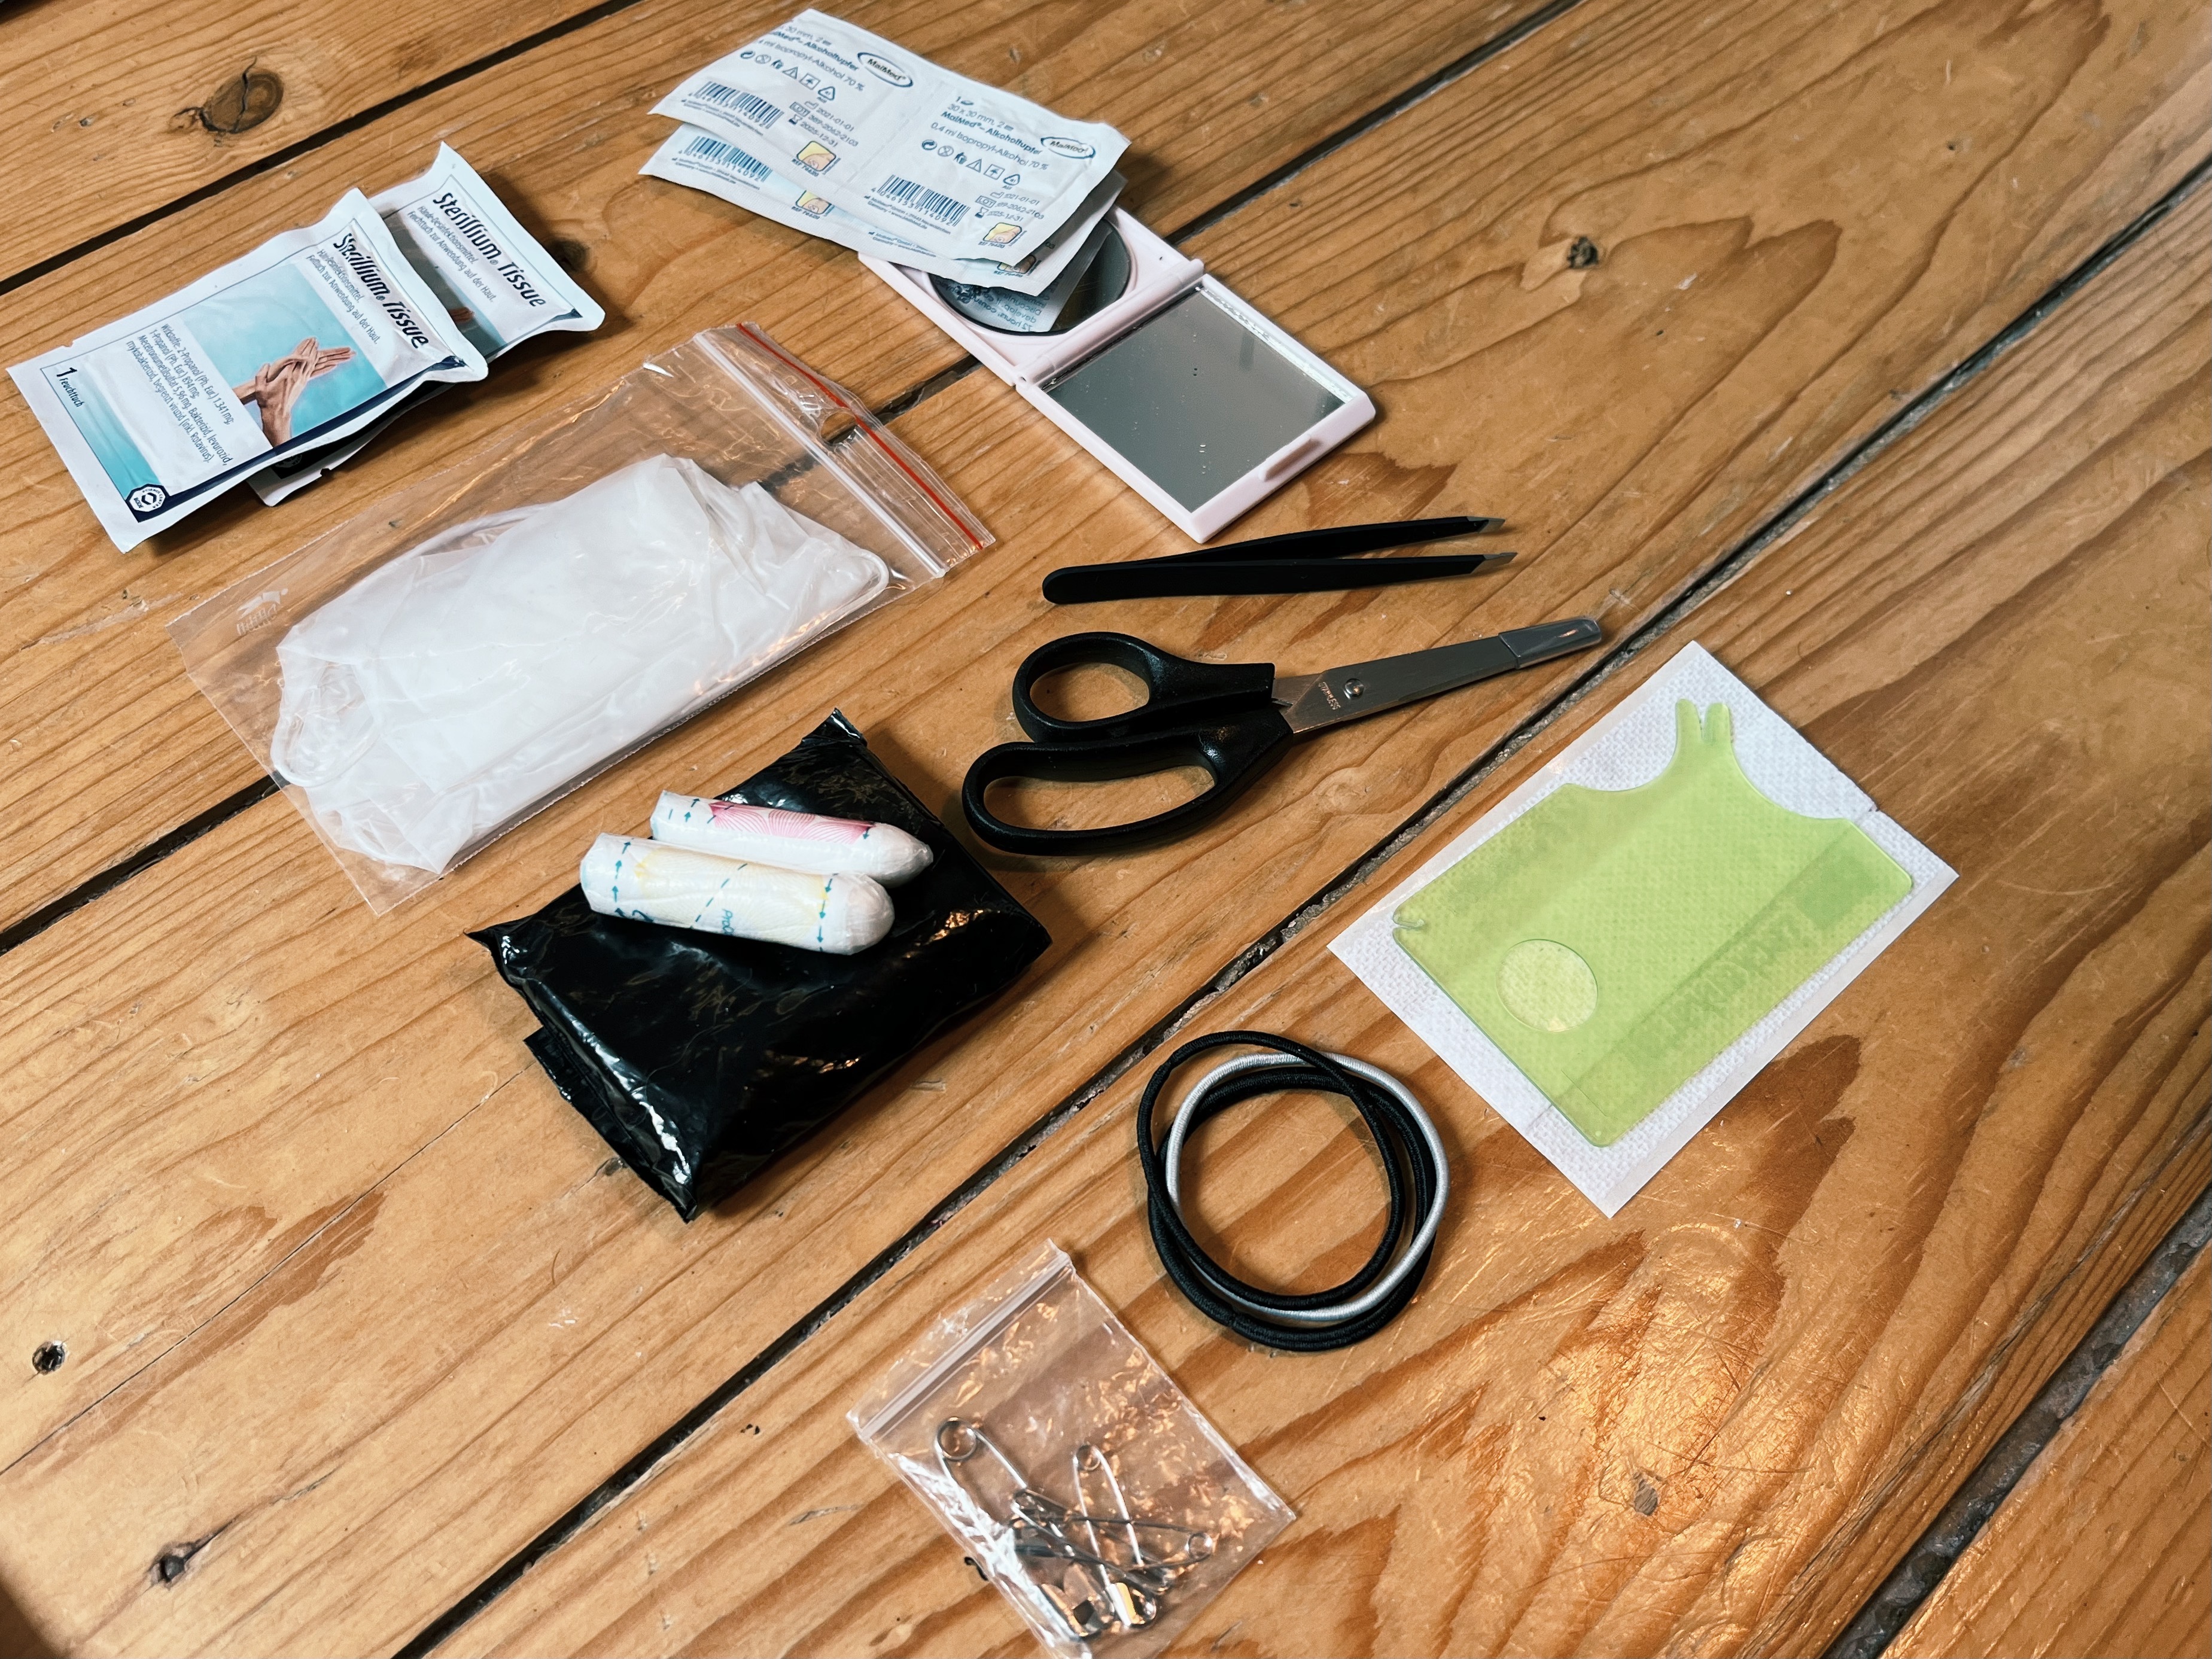
Hygienic & other useful items
- Hand sterilization tissues
- Single use gloves (that fit you)
- Tick card
- Tweezers (and scissors if they are not included in your pocket knife or you don’t carry one)
- A mirror (to check & tend a wound e.g. on your head if you’re alone)
- Tampons & hygenic bags (this is not only important for women, but as a guy you might need to help out a fellow female hiker or, in a real emergency, you can use a tampon as kindling)
- A few safety pins of different sizes
- Hair ties (very helpful to tie together other things than hair, e.g. fixate a bandage)
Something like this could work:
3. Part: Preparing for emergency situations
Let’s hope, we will never need the contents of this compartment. Nonetheless, in case you do get into an emergency situation, it’s best to be prepared. I can’t stress how important it is to go over your individual situation and what awaits you on your adventure before every hike to make sure you pack the right emergency stuff every time.
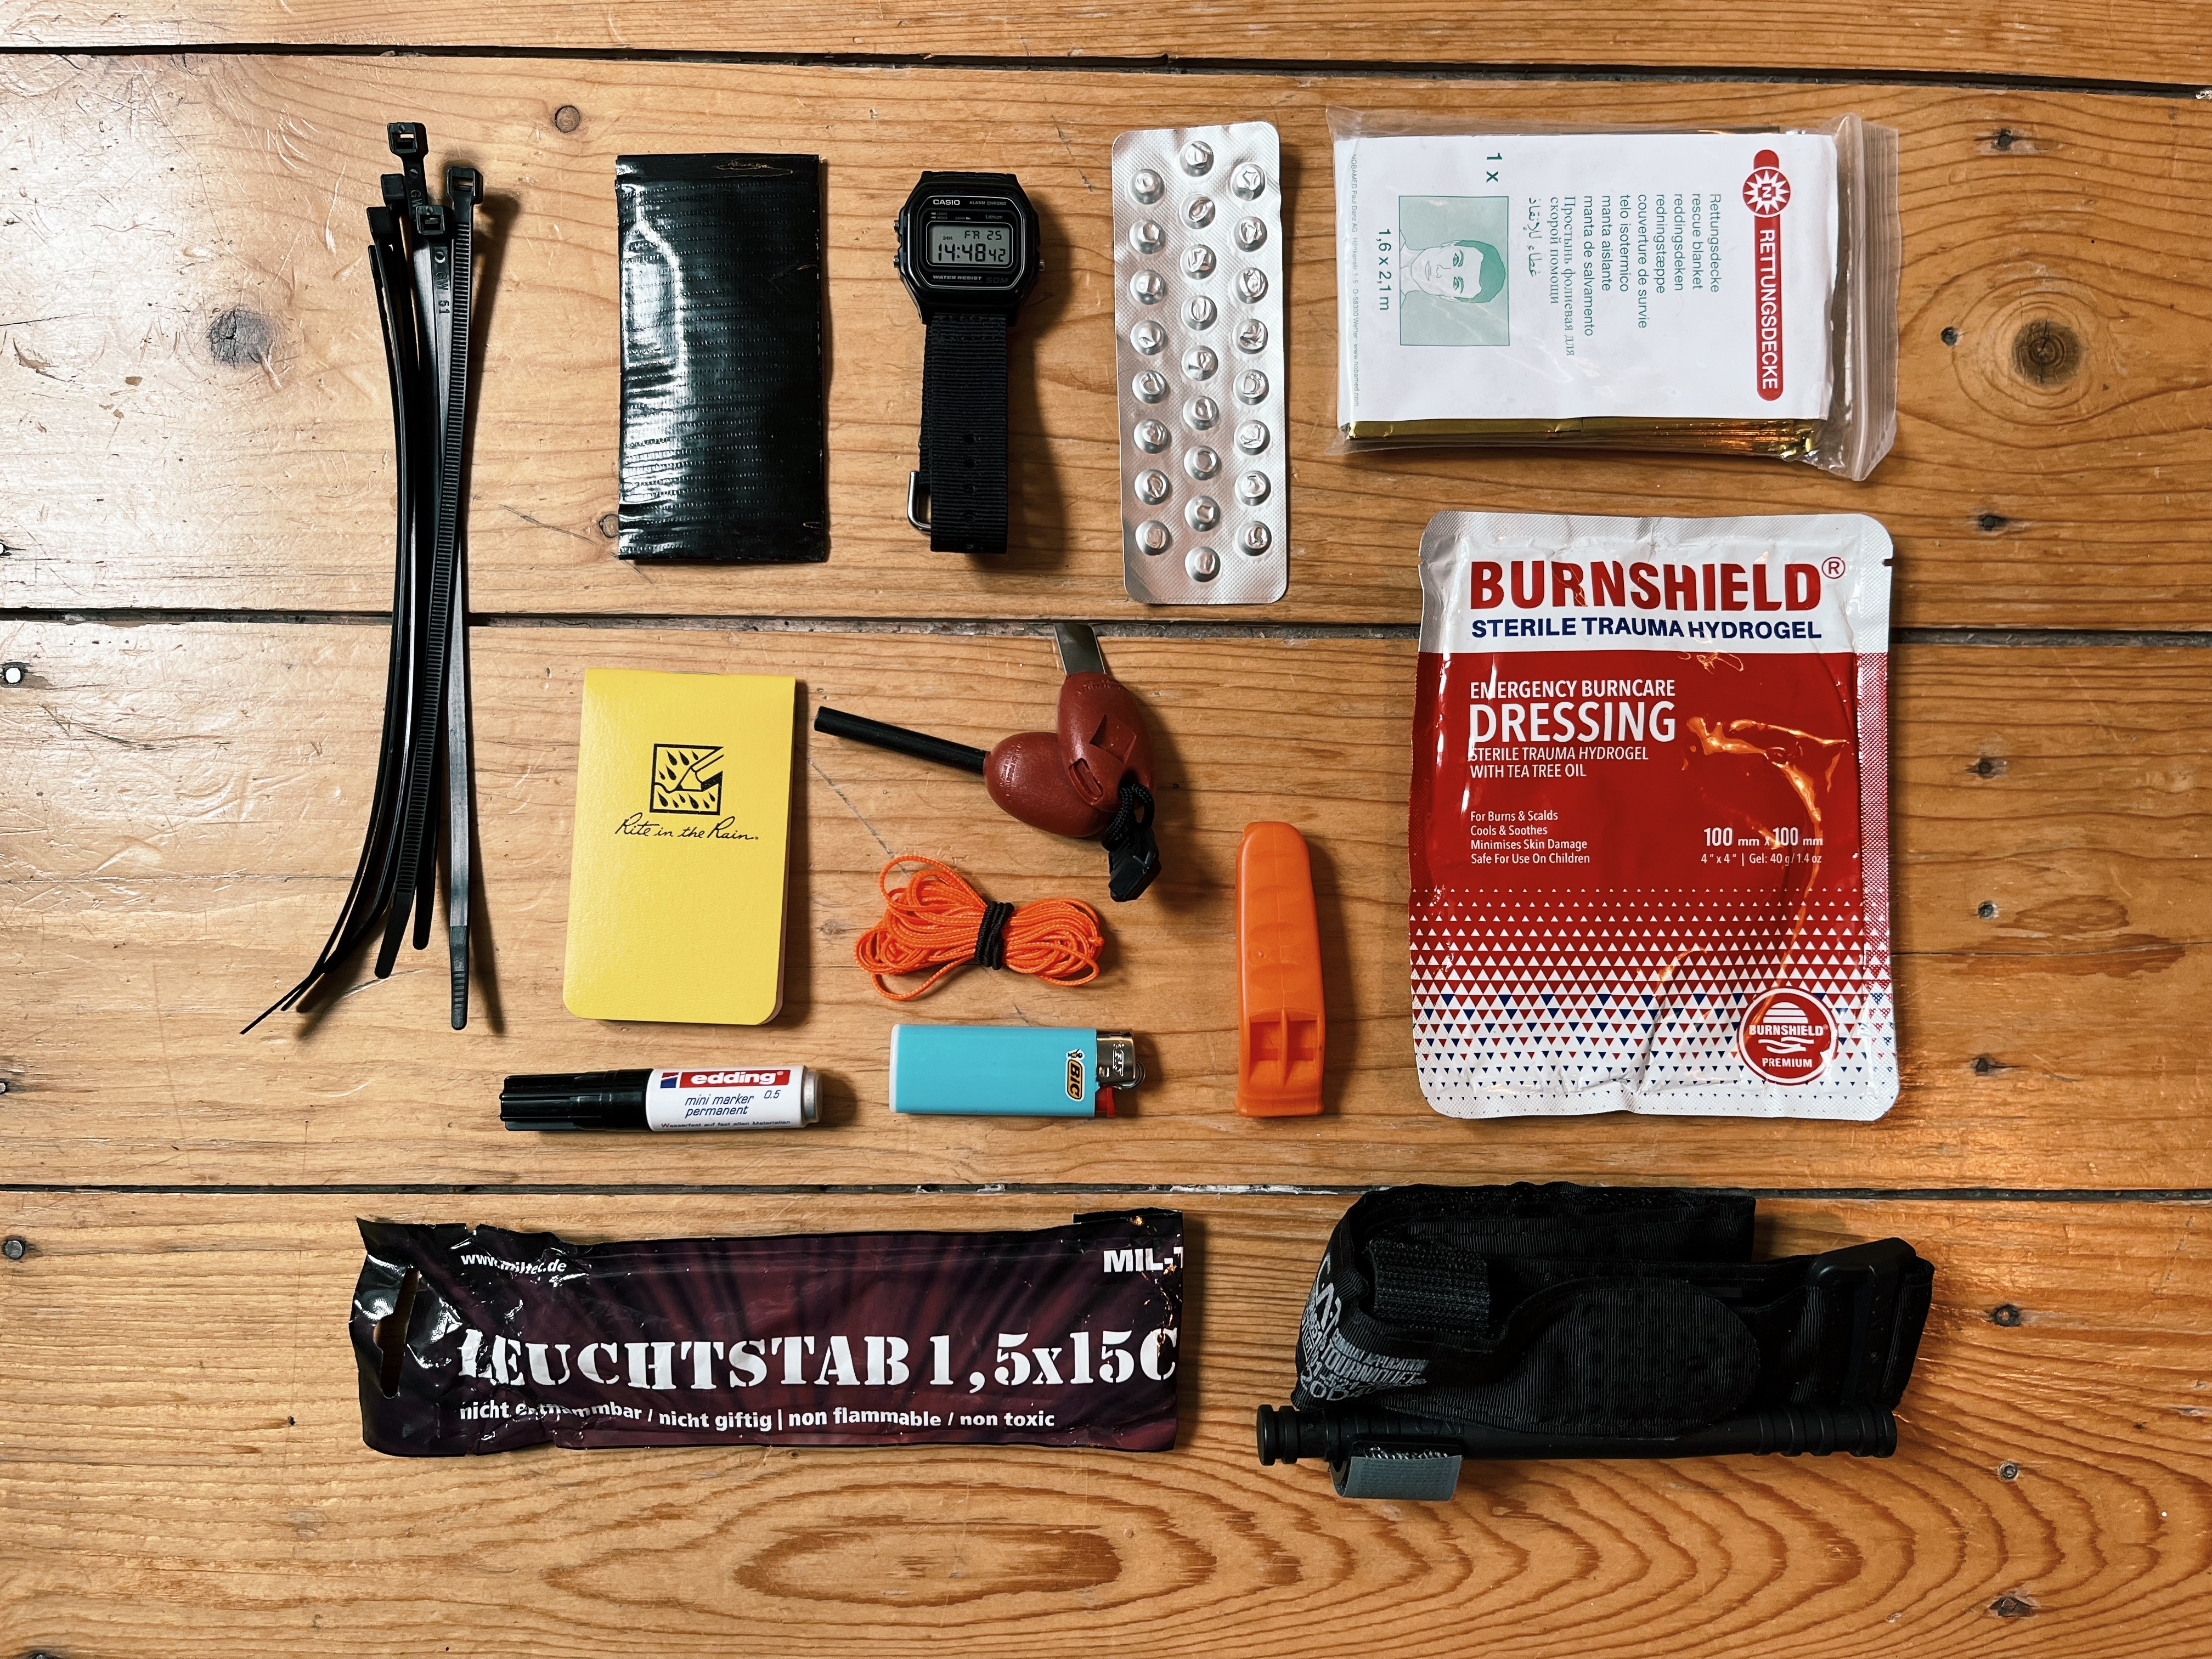
Here’s a round-up of what my “standard” emergency content looks like:
- Emergency blanket
- Emergency burncare dressing
- Water filtration tablets
- Emergency whistle
- Duct tape (one of the most useful things on a hike. I’ve fixed my hiking boots with this, built a hanger for my hiking poles and fixed a leak in my tent. But there’s a lot of medical applications for this as well, like fixating a wound dressing, as a temporary bandage or suture)
- Glow stick (great for marking a spot in an emergency so that you can return to it even if it gets dark)
- Mini sharpie & notebook (there are some that are waterproof, like mine from Rite in the Rain)
- A watch (to keep track of pulse & time)
- Micro cord
- Cable ties
- Fire starter & tinder
- Small lighter
- Many people also carry an emergency Tourniquette. There’s a lot of debeate around if it makes sense to carry one, so I’d recommend you to dyor on this. All I can say is that if you do decide to carry one, buy a high quality one from a trustworthy brand (I got mine from WERO) and make sure to practice how to use it… in an emergency you kinda don’t want to read the manual first.
This is my ermergency section of my hiking first aid kit:
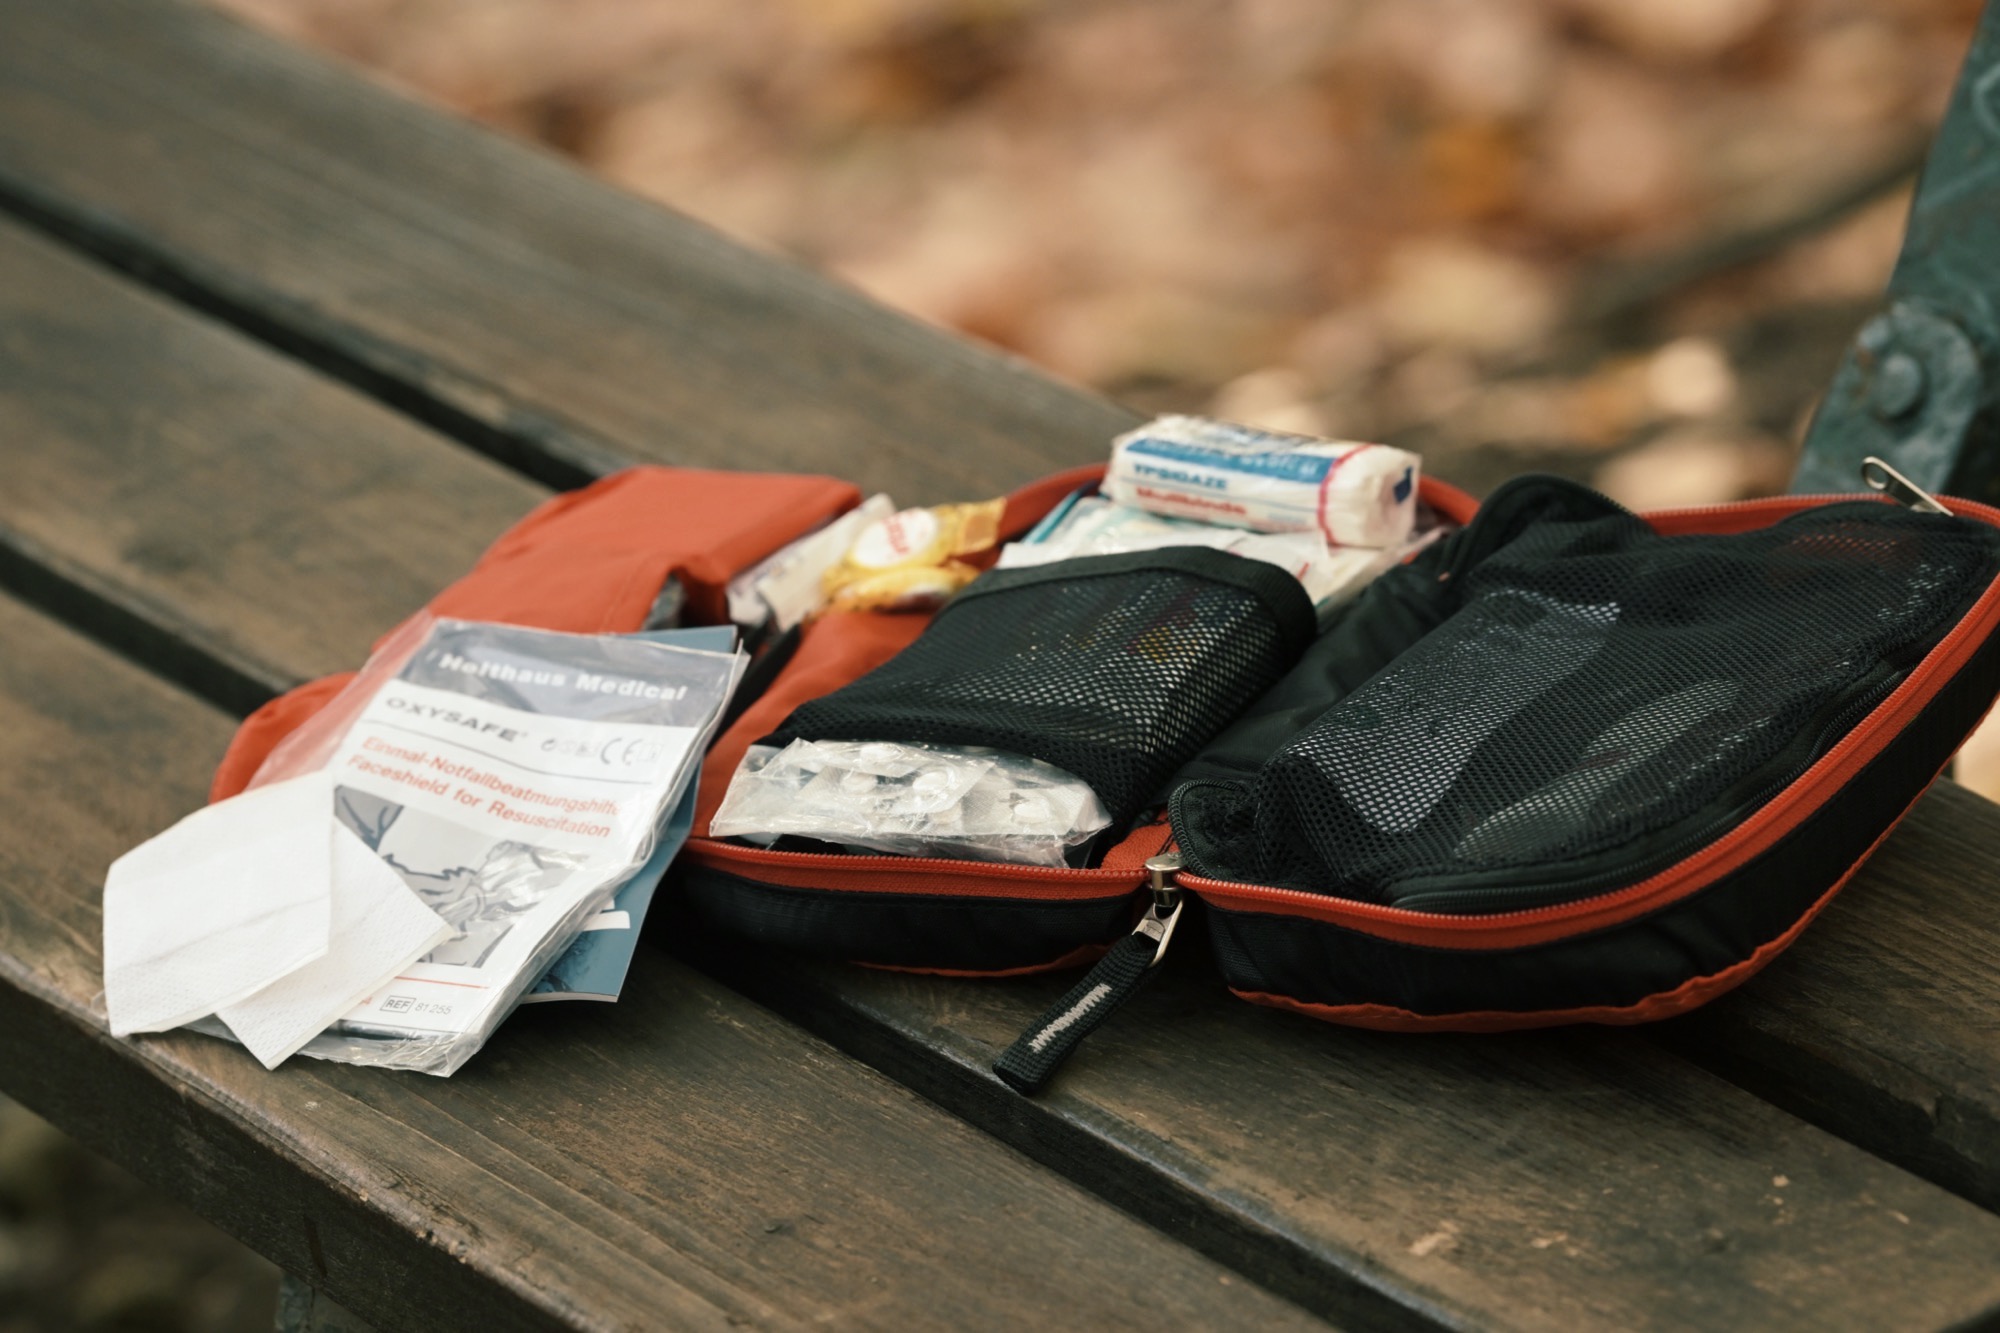
In addition to that, I included a few things, which aren’t packed into any compartment, but lie “on top” once I open the first aid kit. Meaning I can access them very quickly with one hand if needed.
- 2 medium-sized bandages & 1 wound dressing
- Resuscitation aid (I’d even recommend to carry this on you wherever you go, e.g. in and EDC)
- Dextrose sugar
- First aid emergency instruction (panic does weird things to people, so in case you go blank it’s good to have simple instructions on what to do readily available)
If you don’t tuck these things away, you can very easily access them in an emergency.
What’s the Best Pouch for an Outdoor First Aid Kit?
There are several different pre-made first aid kits that already come with a pouch. However, I would highly recommend to at least build these out, replace lower quality content and add the medication and equipment you need for your individual situation or adventure. A pouch for your first aid kit should ideally fulfill the following criteria:
- Be brightly colored, ideally red or orange, labeled with the first aid sign. This will make it easier for you, as well as anyone who is supposed to help you in an emergency situation, to find the first aid kit inside your backpack.
- Have high quality zippers, with which you can open it all the way (not just partially!). This will make it easy and fast to access all the contents.
- Contain several different (but not too many) compartments. This way you can easily store, view and access its contents.
- Be at least water repellent and if you venture into areas with very high humidity, very heavy rainfalls or you’ll be doing activities like water rafting etc. it should be water proof even when submersed.
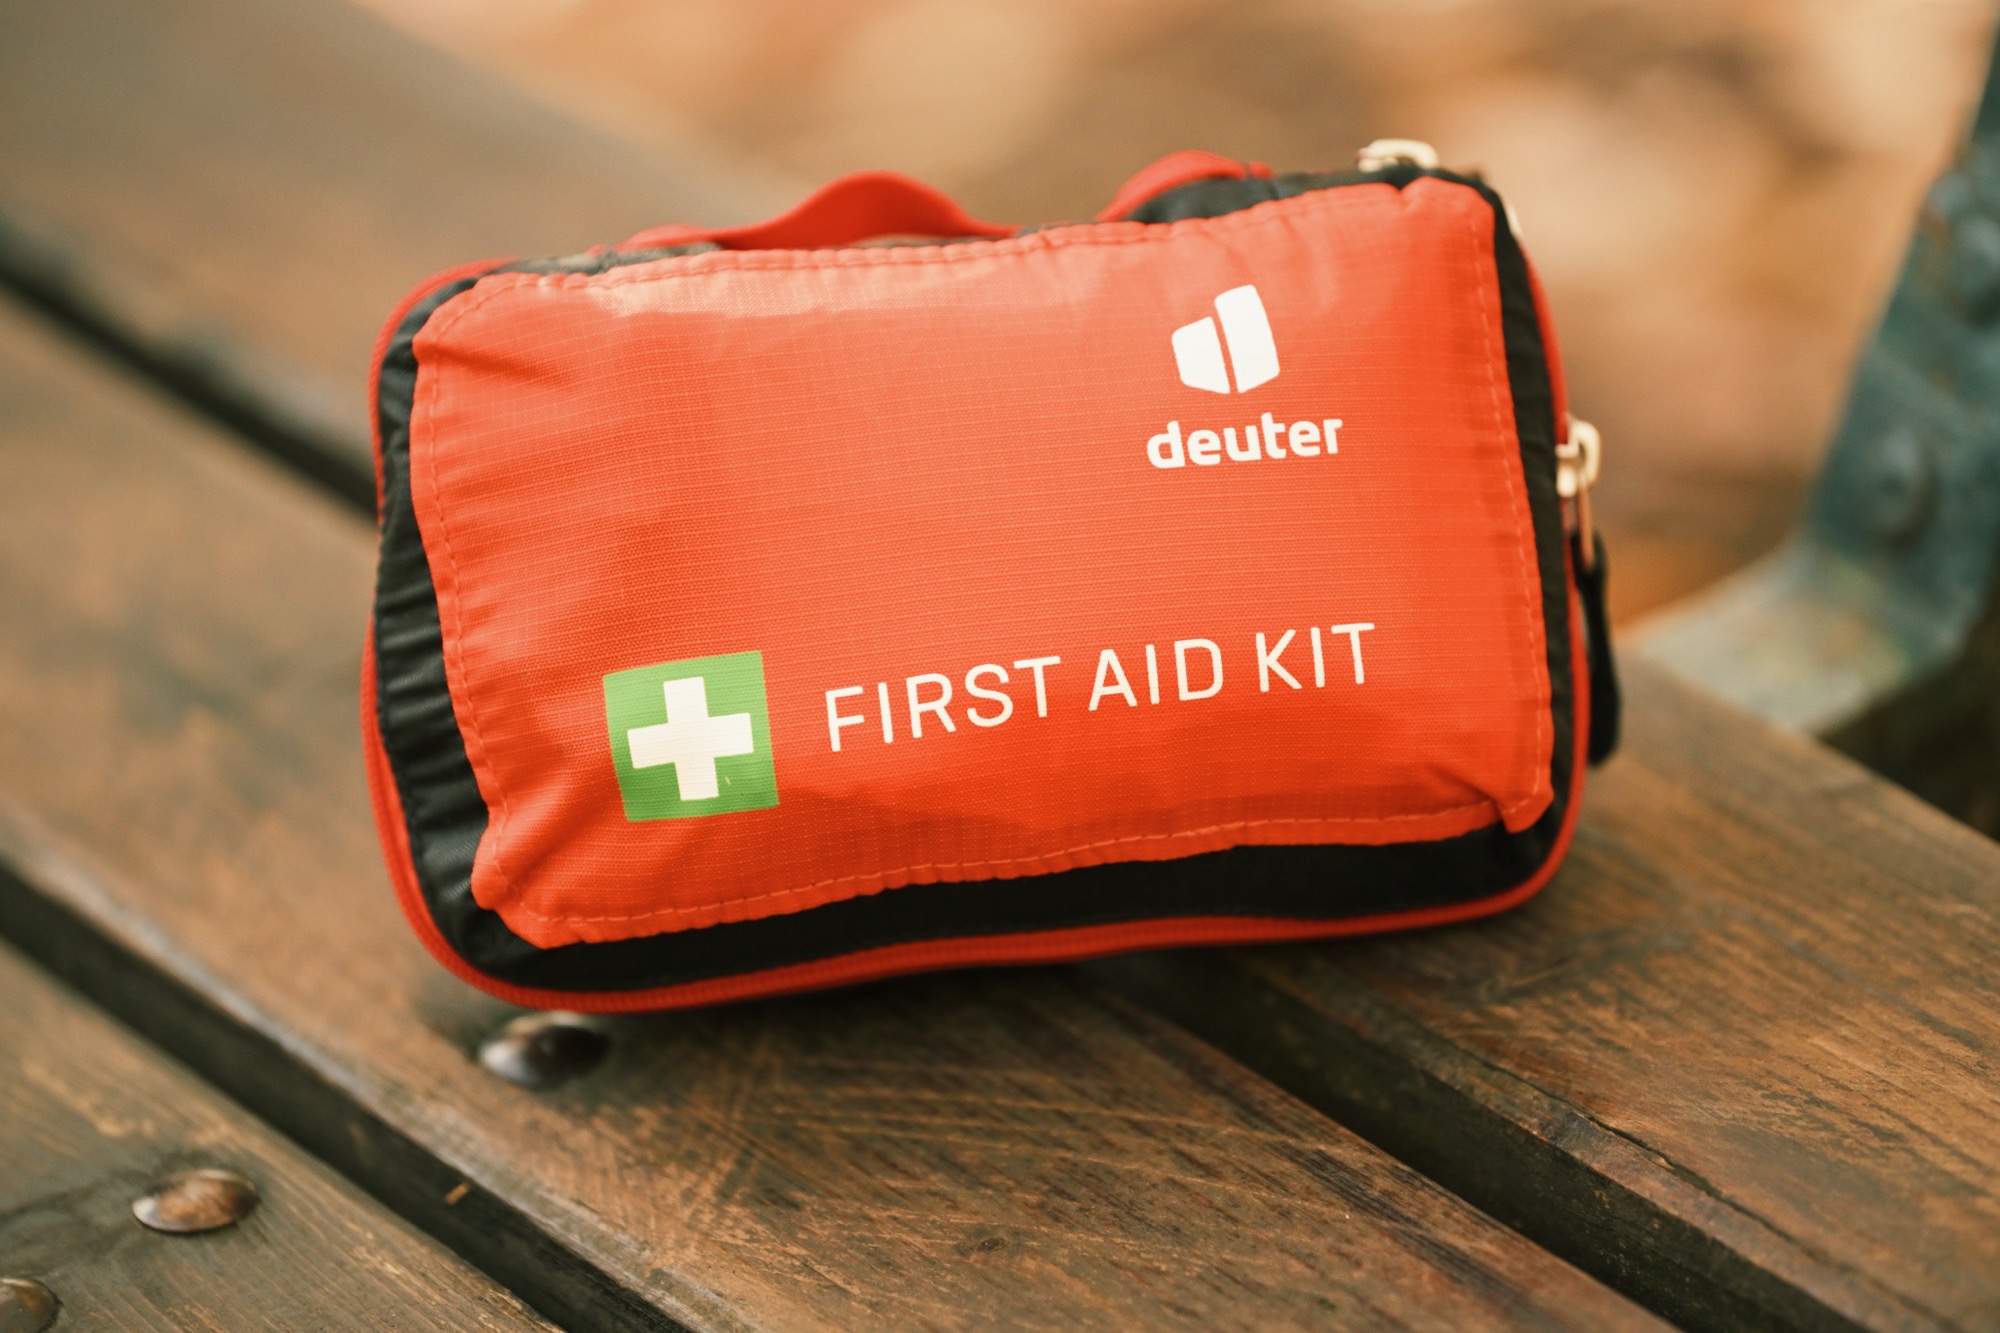
The first aid kit pouch I use and recommend is the Deuter First Aid Kit. It caters to all of the above criteria. It’s relatively light-weight and its size is perfect to store everything mentioned in my list above (although it’s admittably a little more on the tighter end). Another alternative I considered is this pouch from Tasmanian Tiger, which also has a pretty good size and caters to most of the criteria above. However, it’s all black, and slightly more heavy which made me decide for the Deuter pouch.
You Created your Outdoor First Aid Kit, now what?
To finish up this deep-dive into the world of hiking first aid kits, please keep in mind a first aid kit is only useful if you know what’s in it and how to use it! Here are my 6 tips to make sure your first aid kit is actually useful:
- Do a first aid class. And do it regularly. As in every year. Especially in an emergency situation, we are likely to panic and forget things. That’s why it’s super important to get in as much practice as you possibly can.
- Check the contents of your first aid kit regularly to make sure no medication or bandages are out of date. Sidenote: outdated bandages and wound dressings are great to practice first aid with kids (or for youself).
- Pack and unpack your first aid kit regularly so you know where everything is stored and how to access it quickly.
- If you take something out, replace it at the first chance you get (otherwise you will forget!).
- Discuss the contents of your first aid kit with whoever you’re out with. That ensures they also know how to help you in an emergency situation. Discuss possible emergency situations together and how to deal with them best.
- Revise your first aid kit before each and every use and if necessary, tailor it to the specific adventure you’re going on.
- When hiking, store the first aid kit somewhere in your backpack, where it’s easily accessible and always tell your hiking / outdoor buddy where it is located and how to access it.
I hope my experience on this is helpful and has given you some inspiration on how to tailor your very own first aid kit to your individual needs. Keep in mind that we’re all different and every adventure is different. So, the best first aid kit for hiking is always the one your put together yourself. Because…
- It is tailored to your individual needs and situation.
- You have put thought into creating it and thus know its contents very well.
- It will have high-quality contents that you know how to use.
When creating your tailored first aid kit for outdoor adventures, consider including content for
- Basic meds to treat minor illnesses
- Wound dressings
- Hygienic & other useful items
- Emergency situations

Are you new to thru-hiking and want to do a long-distance hiking trail, but don’t know where to start? Check out why I think the Alpe Adria Trail is the ideal long-distance trail for thru-hiking beginners. And if you want to read more on packing for a long-distance hike take a look at my detailed packing guide for hiking a long-distance trail.


